OMOP - Introduction to ohdsilab (start here!)
Source:vignettes/01-intro-to-ohdsilab.Rmd
01-intro-to-ohdsilab.RmdIntroduction
As a first step for using ohdsilab in R, please work through the code in this vignette line by line. It will give you some familiarity with the setup process and querying the data. It also includes important tips on using R and ohdsilab, which might differ from a typical workflow for using R. You’ll want to have the email you received when you first created your box handy, as it has your credentials in it.
Starting a new project
Once you’ve created your workspace (i.e., your virtual computer) from the ohdsilab dashboard, and logged into your computer on the Amazon Workspaces App, you’re ready to get started using R to query the database.
R Projects and {renv}
There are two important (maybe even necessary) steps for using R in the OHDSI Lab. The first is to use a project-oriented workflow. If you’re new to R-projects and a project-oriented workflow, go read this article. You can find more details about projects here: https://r4ds.had.co.nz/workflow-projects.html. The second is to use {renv} to manage package versions within your R projects. This R package, setup guide and the other vignettes assume that you are using these two steps.
After opening RStudio, begin by going to File and select
New Project. Give the project a name and select in your
preferred location using the browse button. Make sure to
check the box that says Use renv with this project. No
problem if you accidentally skip this step, you can still activate
{renv} by running renv::activate() as the first thing you
do in your new project.
Installing Packages
We strongly recommend using the {renv} R package to install ohdsilab and all other packages on your OHDSI-Lab Box/Workspace. Installing packages without {renv} is likely to fail due to permission restrictions.
A guide to using {renv} is here: https://rstudio.github.io/renv/articles/renv.html.
The first thing you should do is update renv. To do this, run the following code in your console.
renv::upgrade()Then, you can install the ohdsilab package from Github like this:
renv::install("roux-ohdsi/ohdsilab")If you want to also install OHDSI packages (e.g., DatabaseConnector), set dependencies = “Suggests”. This is recommended unless you are working on the AllofUs Researcher workbench as these packages take a while to install and are not terribly useful with the AllofUs database setup.
renv::install("roux-ohdsi/ohdsilab", dependencies = "Suggests")You can also install and update regular packages from CRAN:
renv::install("dplyr")You may notice that trying to install packages without using {renv} results in errors that indicate that you don’t have permission to install R packages. This is not the case - you are free to install R packages on your virtual computer/workspace - but you should use {renv} to do is.
Load the ohdsilab package
library(ohdsilab) should also load
{DatabaseConnector}, {keyring}, and other dependencies, but you might
want to explicitly load them for transparency.
Setting up your credentials
There are two sets of credentials you’ll want to set up to make accessing the data and ATLAS easier. These credentials are in an email you received when you first created your workspace.
First, set your credentials for the amazon redshift database (db). These credentials can be found in the email you received when you first launched the workspace next to “Amazon Redshift Username:” and “Amazon Redshift Password:” respectively.
The following code will create a pop-up where you will enter your username and then your password. They save your username and password in the background so that you can access your username and password quickly and securely. Run this code (without editing it):
keyring::key_set("db_username", prompt = "Redshift Username")
keyring::key_set("db_password", prompt = "Redshift Password")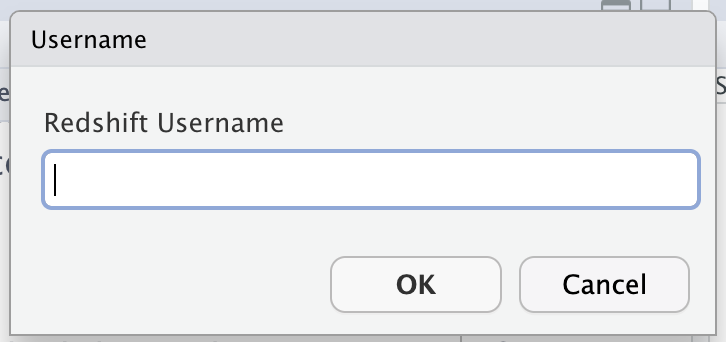
Then try running the following to make sure it’s saved. (Notice that here we are Getting the username rather than Setting the username.)
keyring::key_get("db_username")You should also set up your ATLAS credentials, as they may be different than your redshift database credentials. These credentials can also be found in the email you received when you first launchedy our workspace next to “ATLAS Username:” and “ATLAS Password:” respectively.
Connecting to a database
You’ll use the {DatabaseConnector} package to connect to the database. You will also need to download the Amazon Redshift JDBC driver. To do so, complete the following steps within your OHDSI Lab Workstation:
- Navigate to the Amazon Redshift JDBC download page.
- Click “JDBC 4.2–compatible driver version 2.1 and AWS SDK driver–dependent libraries” to start the download.
- Move the JDBC zip file to a directory of your choosing.
- Right-click on the zip file, and select “Extract” to unzip it.
# Schema Information ===========================================================
cdm_schema <- "omop_cdm_53_pmtx_202203"
write_schema <- paste0("work_", keyring::key_get("db_username"))

# Set the path to the JDBC driver you installed above
Sys.setenv("DATABASECONNECTOR_JAR_FOLDER" = "insert path to jdbc driver here")

# Create the connection
# if you receive an error like "Error in grepl("RedshiftJDBC42", jarPath)...", navigate to the JDBC driver folder and rename all files that begin with "redshift" to something else (EXCEPT for the actual driver, which is titled something like "RedshiftJDBC42"). The new names don't really matter, but for organizational sake, just adding the prefix "notdriver" to each file name works best.

con =  DatabaseConnector::connect(
  dbms = "redshift",
  server = "ohdsi-lab-redshift-cluster-prod.clsyktjhufn7.us-east-1.redshift.amazonaws.com/ohdsi_lab",
  port = 5439,
  user = keyring::key_get("db_username"),
  password = keyring::key_get("db_password"))

# Test if the connection works
if (isTRUE(DatabaseConnector::dbIsValid(con))) print("Connected Successfully")

# make it easier for some r functions to find the database
options(con.default.value = con)
options(schema.default.value = cdm_schema)
options(write_schema.default.value = write_schema)
When you start a new R script to do some analysis, you won’t need to re-download the drivers or store your username and password (as long as you are in the same ohdsilab workspace). In fact, you don’t need most of this code. You can also start your script off using a shortcut function in from the ohdsilab package, which will do the same thing.
library(ohdsilab)
library(DatabaseConnector)

con <- ohdsilab_connect(
    username = key_get("db_username"),
    password = key_get("db_password")
)
Querying the database
The ohdsilab pharmetrics database uses amazon redshift SQL and the OMOP CDM version 5.3.
You can see information in the 5.3 OMOP version here: https://ohdsi.github.io/CommonDataModel/cdm53.html. The database organization looks like this (this is a very similar OMOP CDM 5.4 - there are only very minor differences).
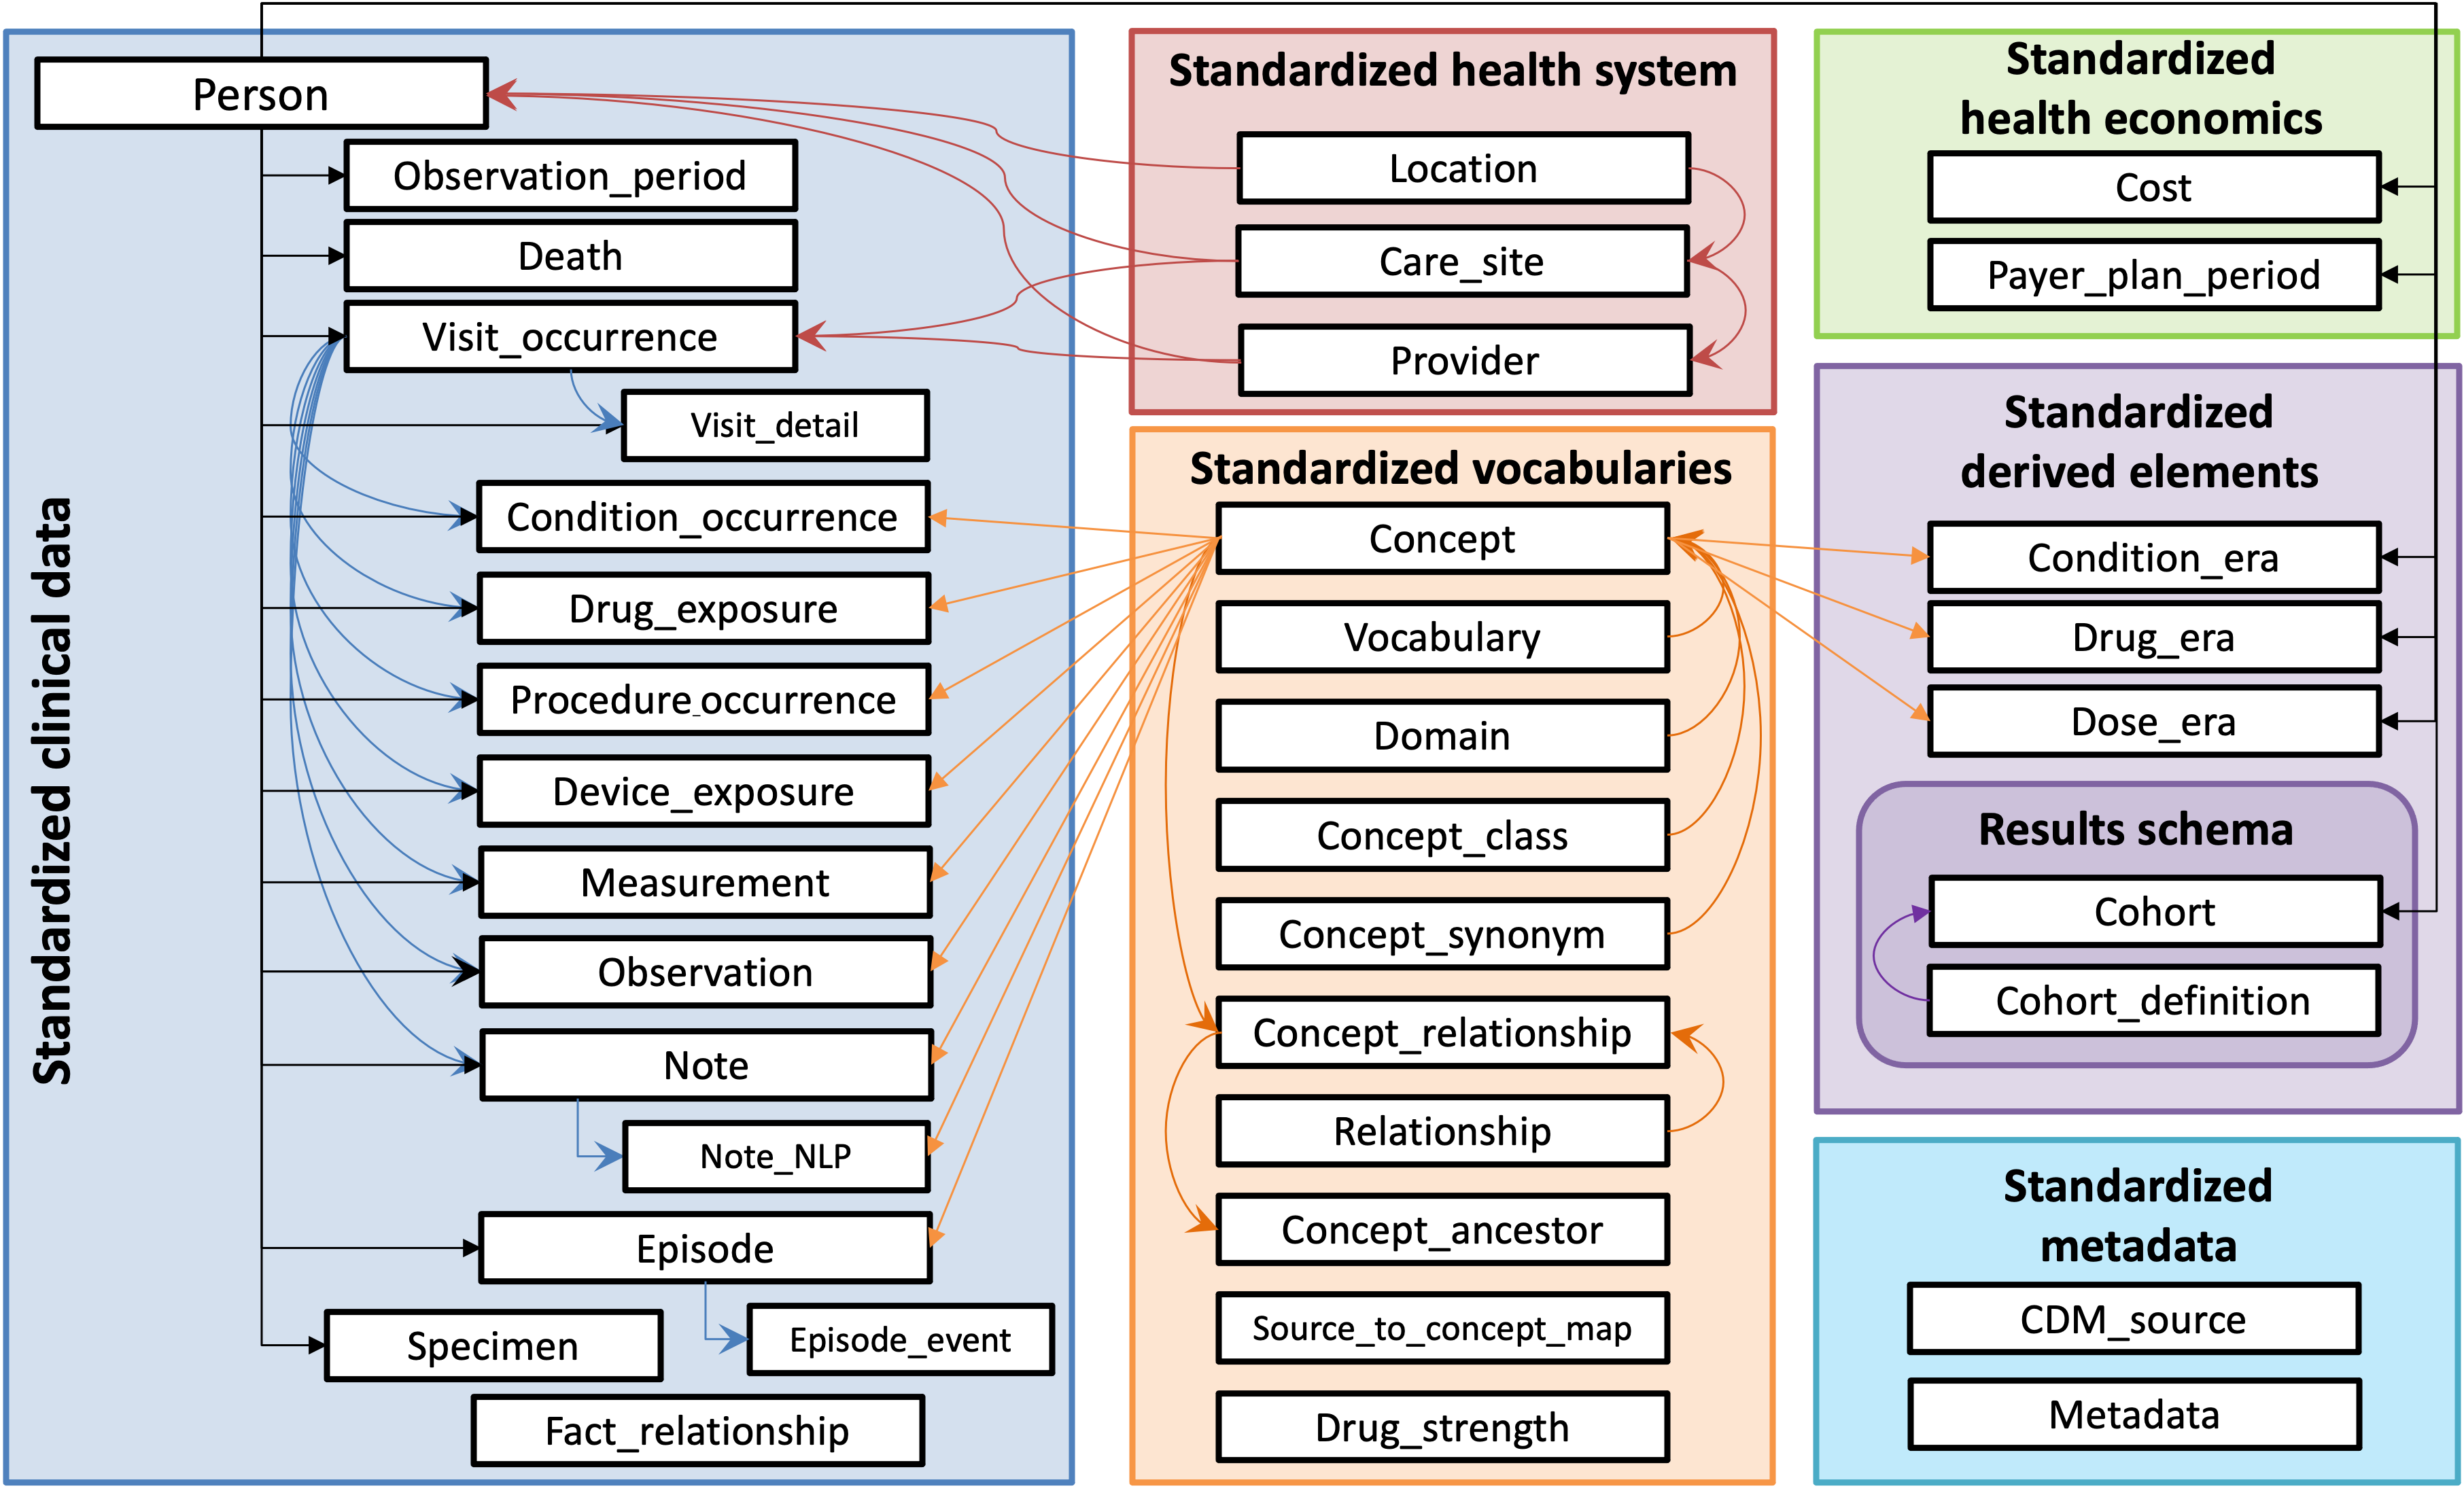
A more comprehensive diagram with information about the columns in each of the tables can be found here: https://lucid.app/lucidchart/dc75ba24-cbb6-4152-9528-a1f67b4b3843/view?page=0_0&invitationId=inv_d9040d51-a9b0-4d91-b3e5-f2f0ce927cf7#
The data help in the database is stored under the cdm schema. You can think of a schema as kind of like a subfolder in the database. So the pharmetrics data is stored in ohdsilab/omop_cdm_53_pmtx_202203/… where the … indicates what table you’re interested in.
To query a table in pharmetrics you might write a line of code like this:
library(dplyr) # for tbl() function
# we also have ohdsilab and DatabaseConnector loaded as above
# and have created the con object using ohdsilab_connect

tbl(
    con,
    inDatabaseSchema("omop_cdm_53_pmtx_202203", "concept")
  )
This code is looking for the concept table in the pharmetrics schema which is in the ohdsilab database. You can also see the concept table in the orange box labelled “Standardized Vocabularies” in the picture above.
You also have your own schema (sometimes called your “scratchpad”) where you can save information pertinent to your studies. If you were usr999, you could access a table (that you have previously created) like this:
# note - this wont actually work! the table doesn't exist
tbl(
    con,
    inDatabaseSchema("usr999", "myCohort")
    )
Because both of these tables are in the database, we can connect them
together. For example, you might use {cohortGenerator} to generate a
cohort table in your schema (“myCohort”). Your cohort table includes a
column of person_id’s (and some other information) that you can use to
reduce the giant amount of data in pharmetrics - usually with an
inner_join.
(See https://ohdsi.github.io/CohortGenerator/articles/GeneratingCohorts.html for a tutorial)
tbl(
    con,
    inDatabaseSchema("usr999", "myCohort")
  ) |>
  dplyr::inner_join(
    tbl(
      con,
      inDatabaseSchema("omop_cdm_53_pmtx_202203", "person")
    ),
    by = "person_id"
  )
Remembering the name of the database schema and your usr schema can
be a bit annoying. That’s why you should get in the habit of saving the
schema names as variables at the top of your scripts, so you can just
reference these strings using the variables cdm_schema and
write_schema.
cdm_schema <- "omop_cdm_53_pmtx_202203"
write_schema <- paste0("work_", keyring::key_get("db_username"))
It might look like this:
tbl(
    con,
    inDatabaseSchema(write_schema, "myCohort")
  ) |>
  dplyr::inner_join(
    tbl(
      con,
      inDatabaseSchema(cdm_schema, "person")
    ),
    by = "person_id"
  )
This can still be quite a bit of code for each join. Additionally,
there are some known bugs with using the dplyr *_join functions with our
redshift database isntances. For these reasons, we recommend that you
use the ohdsilab::omop_join() function can help streamline
your code. It’s a wrapper for the dplyr join functions that
also includes some workarounds for a few known bugs in the backround so
that you don’t have to worry about them as much.
tbl(
    con,
    inDatabaseSchema(write_schema, "myCohort")
  ) |>
  omop_join("person", type = "inner", by = "person_id")
It works because we set the default connection and cdm_schema using
the ohdsilab_connect() function. If you didn’t use that
connection to connect, you will have to set them manually:
The omop_join() function will look for these defaults
first, and if it doesn’t find them (because you didn’t run these two
lines), will let you know you need to provide them directly. Note that
if you want to point omop_join() to your user scratchpad,
you only need to use the argument
schema = write_schema.Here’s a toy example of how we can
put all this information together. We can extract all conditions for
women born in 2002. Try to run these chunks to make sure everything is
working.
# Start with a pointer to a table in the database. It could be in the cdm_schema
# or in your user write_schema.
female_2002 <- tbl(con, inDatabaseSchema(cdm_schema, "person")) |>
    # filter the data for women born in 2002
    filter(year_of_birth == 2002, gender_source_value == "F") |>
    # select only the necessary columns
    select(person_id) |>
    # join to the condition occurrence table using an inner join
    omop_join("condition_occurrence", type = "inner", by = "person_id")
# run to see a preview of the top 10 rows
female_2002
# how many rows are in our data?
tally(female_2002)
If you get an error from the database, you often will need to “rollback” before running a new command. The error that tells you that you need to “rollback” usually looks like this:
Error in `db_query_fields.DBIConnection()`:
! Can't query fields.
Caused by error in `.createErrorReport()`:
! Error executing SQL:
com.amazon.redshift.util.RedshiftException: ERROR: current transaction is
aborted, commands ignored until end of transaction block
An error report has been created at .../errorReportSql.txt
Run `rlang::last_trace()` to see where the error occurred.
A rollback is essentially like going back in time to a world before you ran the chunk of code that caused an error. You can easily do this using ohdsilab, provided you’ve set the connection and schema default values above.
rb()This is synonymous with running.
executeSql(con, "ROLLBACK;")Summary
If you’re able to connect to the database and run a few basic queries - you should be good to go. Next, check out some of the other articles on this website. You might also want to browse Athena (https://athena.ohdsi.org/) to start thinking about how your area of interest is represented in OMOP. There are also lots of videos on using the OMOP CDM on youtube (https://www.youtube.com/@OHDSI).